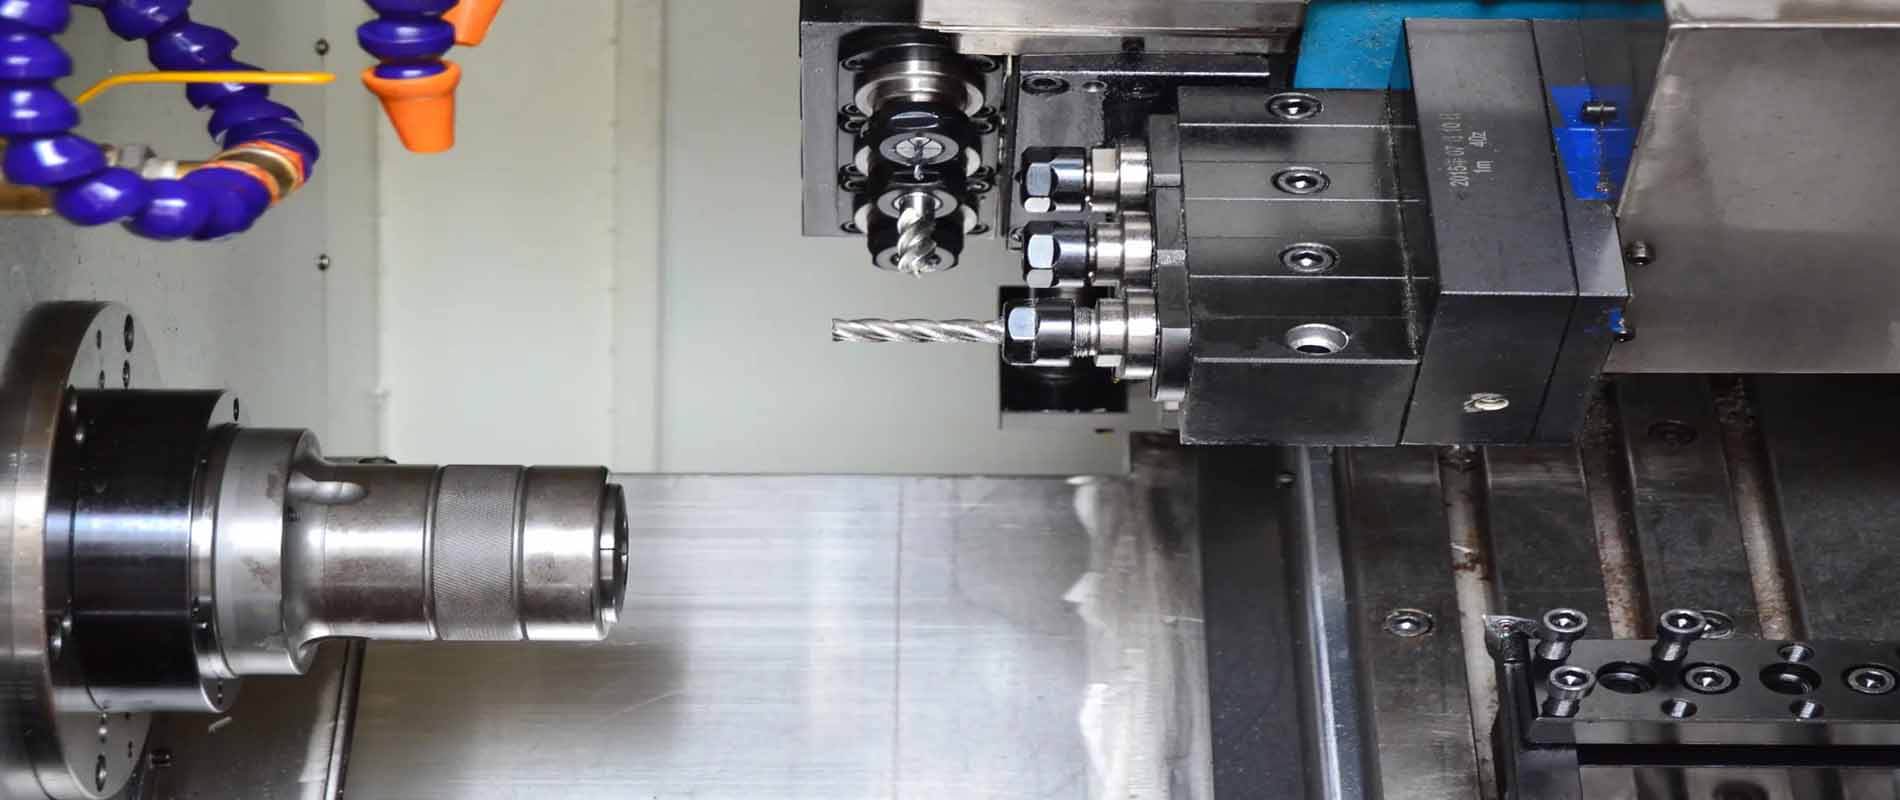
CNC Turining and Milling
Some we would like to share with you about CNC turning and milling.
“CNC turn-milling ” encompasses both turning and milling operations. In simple terms, it is a combination of these two machining processes, making it a hybrid machining method. It encompasses various functions such as turning-milling compound, turning-milling-grinding compound, and milling-grinding compound. The purpose of this compound processing is to enable a machine tool to perform multiple functions, allowing for the completion of multiple tasks in a single setup, thereby improving processing efficiency and accuracy. CNC turn-milling compound machining combines various processing methods such as turning, milling, drilling, and boring to perform surface machining on a variety of workpieces.
CNC turning and milling is an advanced manufacturing technology in the field of mechanical machining that combines the functional characteristics of CNC lathes and CNC milling machines on a single machine tool. It is a new cutting theory and technology that has emerged with the significant development of CNC technology. By combining the characteristics of multiple CNC lathes into a single machine, it greatly reduces the required floor space and lowers costs such as rent and capital expenditure.
It can be equipped with 1-8 milling power heads, integrates multiple processes, achieves high processing accuracy, and saves processing time. The CNC turn-milling is one of the advanced manufacturing technologies in the modern mechanical machining industry. It is an advanced manufacturing technology that combines several different machining processes on a single machine tool. In general, CNC turn-milling can be seen as a mechanical machining equipment that combines the functional characteristics of CNC machining centers and CNC lathes.
However, typical turning centers only replace the turret of a CNC lathe with a power-driven turret and add C-axis functionality to the spindle. Due to limitations in the structure and dimensions of the turret, the power of the milling head is limited, and it cannot accommodate large-sized tools. In such turning centers, turning is the primary function, while milling and drilling serve as auxiliary processes. The high cost of the power-driven turret results in high manufacturing costs for turning centers, with domestic prices generally exceeding 15000usd/unit and imported ones exceeding 30,000usd/unit, which is often unaffordable for ordinary users. Economical turning-milling compound machines mostly employ XZC axes, which means adding a rotating C-axis to the chuck to achieve basic milling functionality.
Although the unit price of CNC turning and milling machine is higher, from an enterprise investment perspective, they can effectively reduce overall fixed asset investment and decrease production operations, personnel, and equipment management costs.
At present,CNC turning-milling linked CNC machining centers and their system software are used for the production and processing of parts such as impellers, blades, propellers for ships, heavy-duty motor rotors, steam turbine generators, and medium-to-large diesel engine crankshafts. They can be used for modern mold production and processing, including automotive components and aircraft structural parts.
The purpose of compoundization is to equip a machine tool with multifunctionality, enabling the completion of multiple tasks in a single setup and improving processing efficiency and accuracy. Due to the predominance of CNC turning and milling operations in product manufacturing, the use of CNC turning and milling processes on compound machine tools is widespread.
What is turning and milling machining?
Combined CNC turning and milling machine: Also known as a 5-axis dual power head machining center. Generally it is used for CNC turning and milling. This machine was originally used for machining propellers, as it avoids the loss of accuracy and reference caused by multiple setups.
What are the Characteristics and Advantages of CNC Turning and Milling?
Reduced number of setups and improved machining accuracy
Reduced the area and lower machining costs
Streamlined product manufacturing processes and improved efficiency
Additionally, the turning-milling process allows for the completion of all or most machining operations in a single clamping, significantly shortening the manufacturing process for the product. This approach not only reduces production auxiliary time caused by tool changes but also minimizes the manufacturing cycle and waiting time for tooling fixtures, resulting in a remarkable improvement in machining efficiency. The turning-milling process, by completing multiple machining operations in one clamping, effectively reduces machining time while enhancing precision and efficiency. Therefore, turning-milling compound processing possesses advantages that are unique compared to other mechanical machining methods. CNC turning and milling machines seamlessly combine the capabilities of CNC lathes and multi-sided machining centers, enabling the simultaneous completion of external turning, hole drilling, cutoff, and multi-sided machining processes. This results in high concentricity of products and versatile applications.
The CNC turning-milling machines features a monolithic structure for its body and base, ensuring excellent seismic resistance and stability. Additionally, it utilizes imported linear guides to ensure reliable equipment operation.
CNC turning and milling machines allow for spindle positioning according to different products and can perform cutting on any polygonal shape (e.g., triangles, squares, pentagons, hexagons, heptagons, etc.) simultaneously. When not using the multi-sided turning function, CNC turning and milling machines can also function as high-precision CNC lathes.
These numerous advantages of CNC turning and milling machines align with the modern metalworking industry’s requirements for efficient, profitable, and cost-effective machining methods. Therefore, the development of CNC turning and milling machines is expected to reach higher levels driven by market demand.
What does G18 mean in combined turning and milling machines?
How can C-axis milling achieve hexagonal surfaces?
What is the purpose of CNC turning and milling?
What are the types of CNC turning and milling?
In the field of ordinary precision mechanical manufacturing, the most commonly used combined machining methods involve conventional machining, electrochemical machining, and electrical discharge machining.
In recent years, with the development of CNC technology and the widespread application of integrated design methods for product components, combined turning and milling, milling and turning combined machining, and cutting-electrical machining combined machining methods have rapidly developed in the field of mechanical machining. These methods have become important means of supporting the processing of modern aerospace products. The continuous introduction of new combined machining equipment has strongly supported the development and application of combined machining technology.
What are the Differences Between CNC Turning and Milling and Swiss Lathes Machining?
In contrast, the workpieces in Swiss-type machining can have a longer length due to the presence of a bar feeder, but the diameter is typically small, less than 32mm, while maintaining high precision. In Swiss-type lathes, the tools remain stationary while the spindle moves the workpiece for interpolating motion.They feature a sliding spindle collet and often include additional tools such as live tools and sub-spindles to perform both milling and turning operations.
Workpiece handling: In CNC turning and milling machines, the workpiece is typically clamped in a chuck or collet and rotates during turning operations, while milling operations are performed with the workpiece stationary. On the other hand, Swiss lathes use guide bushings to provide additional support to the workpiece, allowing for precise machining of small, slender parts. The workpiece is clamped in the guide bushing and moves through the machine as material is removed by the tool.
Complexity and size of parts: CNC turning and milling machines are capable of machining parts of various sizes and complexity. They can handle larger workpieces, suitable for producing components with both rotational and prismatic features, typically with a diameter above 32mm. On the other hand, Swiss lathes are particularly suited for complex parts that are small in size, generally with a diameter below 32mm and strict tolerances. They excel at producing slender, high-precision parts such as screws, pins, and medical implants.
Machining capabilities: CNC turning and milling machines offer versatility in terms of the operations they can perform. They can perform turning, milling, drilling, and other operations, allowing for the production of complex parts in a single setup. Swiss lathes, although primarily focused on turning and milling, often provide additional capabilities such as cross drilling, thread whirling, and polygon turning, which are particularly advantageous for Swiss-style machining.
Presence of bar feeder: CNC turning and milling machines generally process larger-sized workpieces, making them unsuitable for continuous machining with a bar feeder. This can significantly reduce processing efficiency compared to Swiss lathes, which are equipped with bar feeders that enable uninterrupted and repetitive machining, resulting in higher efficiency.
What is the Cost of CNC Turning and Milling?
What are the common types of cutting tools used in CNC milling and turning?
End Mill: A versatile cutting tool with cutting edges on both the bottom and sides, used for various milling operations such as facing, profiling, slotting, and pocketing.
Ball End Mill: These tools have a spherical end and are suitable for machining curved surfaces and 3D contours. They are typically used for finishing operations.
Face Mill: Face mills have cutting edges on the periphery and surface. They are typically used for facing large flat surfaces or generating shallow contours.
Drill Bit: Drill bits are used to create holes in workpieces. They come in various types, including twist drills, center drills, and spot drills.
Reamer: Reamers are used to enlarge and precision-finish existing holes, achieving accurate dimensions and smooth surfaces.
Slotting Cutter: Slotting cutters are designed for making slots or grooves on workpieces. Their teeth can be straight or staggered.
External Turning Tool: External turning tools are cutting tools used in CNC turning processes to machine the outer contours of workpieces.
Form Turning Tool: Form turning tools are cutting tools used in CNC turning to machine workpieces based on specific contour shapes, suitable for tasks requiring replication or tracing of workpiece profiles.
Facing Tool: Facing tools are cutting tools used in CNC turning processes, primarily for machining the end and flat surfaces of workpieces.
Internal Turning Tool: Internal turning tools are cutting tools used in CNC turning processes to machine the inner circular surfaces or holes of workpieces.
Single-Point Tool: These are the most common tools used in CNC turning. They have a single cutting edge and are used for various turning operations, including roughing, finishing, and profiling.
Boring Bar: Boring bars are used to enlarge existing holes or create internal features like cylindrical bores.
Threading Tool: Threading tools are used for cutting external or internal threads on workpieces. They come in various forms, including single-point threading tools and thread milling cutters.
Grooving Tool: Grooving tools are designed for creating grooves, slots, or internal features on workpieces.
Parting Tool: Parting tools are used to separate a workpiece into multiple parts by creating a narrow cut or groove to separate the material.
What quality control measures are in place during the CNC milling and turning process?
A: During the CNC milling and turning process, Masion strictly controls the precision of workpiece inspection in accordance with ISO 9001 standards to ensure quality compliance. The following are some inspection measures and methods.
Initial Inspection: Before the machining process begins, operators or quality control personnel visually inspect the raw materials to confirm their dimensions, surface conditions, and any other specifications. This ensures that the materials meet the required standards.
Machine Calibration: CNC machines need regular calibration to maintain their accuracy. This includes checking and adjusting various machine parameters such as axis alignment, tool offsets, and spindle runout to ensure the machine operates as expected.
Tool Inspection: Tools are inspected before use to ensure they are in good condition. This includes checking for any signs of wear, damage, or defects. Proper tool inspection helps maintain consistent machining quality and prevents tool-related issues during the process.
In-process Inspection: During CNC milling and turning, regular inspections are conducted to monitor the machining process. Measurement tools such as calipers, micrometers, and dial indicators are used to measure dimensions and verify if the linear dimensions of the workpiece meet the requirements. Traditional handheld measuring tools or more precise Coordinate Measuring Machines (CMM) can be used for measurements.
Final Inspection: Once the machining is completed, a final inspection is conducted to confirm that the finished product meets the required specifications. This may include measuring critical dimensions, performing surface roughness analysis, conducting functional tests, or comparing machined parts with CAD models or engineering drawings.
Surface Quality Inspection: The quality of the workpiece surface is evaluated through visual inspection or using tools such as surface roughness testers. This ensures that the workpiece surface is smooth, free from scratches, and meets specification requirements.
Geometric Shape Inspection: Measurement tools such as projectors, profile projectors, or optical measuring machines are used to inspect the geometric shape of the workpiece, including parameters such as roundness, parallelism, perpendicularity, and angles. These measurement tools provide more precise geometric shape analysis.
Profile Inspection: Profile measurements are conducted to ensure that the workpiece profile matches the required design. Optical projectors, laser scanners, or CMM equipment can be used for profile measurements.
Process Control: Key process parameters such as cutting speed, feed rate, cutting depth, etc., are monitored and controlled in real-time to ensure process stability and consistency. Sensors and automatic control systems can be used to monitor and adjust these parameters.
Tool Wear Monitoring: Tool wear is monitored to predict cutting performance and workpiece quality. Tool wear monitoring systems can be used to monitor tool wear in real-time, enabling timely replacement or repair of tools to maintain machining quality.
Records and Traceability: Quality control measures also include recording all relevant data and maintaining traceability. This includes documenting inspection results, machine settings, mold details, and other relevant parameters. Proper documentation allows for traceability, troubleshooting, and quality analysis.
Data Analysis and Statistical Control: Analyzing and statistically analyzing process data can help identify potential issues and trends and take corrective and improvement measures. This can be achieved through the use of Statistical Process Control (SPC) and other quality management tools.
How does the CNC milling and turning process work?
A:Drawing Preparation: Upon receiving customer drawings, we analyze all dimensions, with particular attention to critical tolerances, and plan the manufacturing process accordingly.
CAM Programming: The PDF or STEP file of the drawing is imported into CAM software to generate tool paths and instructions for the CNC lathe. This includes specifying cutting tools, their speeds and feeds, and required machining operations.
Workpiece Setup: The workpiece, typically cylindrical or tubular in shape, is mounted on the lathe’s chuck or collet. It must be properly aligned and securely fixed to ensure accurate machining.
Tool Setup: Appropriate tools, such as single-point tools or those specifically designed for threading or grooving, are selected and installed on the tool holder of the lathe.
Rough machining: Utilizing methods such as turning, milling, drilling (including CNC) to remove most of the excess material from the inner and outer surfaces of the component.
Semi-finish machining: Using methods like turning, milling, drilling (including CNC) to complete the machining of non-mating surfaces to a general level of accuracy and prepare them for finish machining by establishing positioning surfaces.
Finish machining: Employing precision turning, precision milling, precision grinding, and other methods to carry out the final machining of critical surfaces of the component.
Dimensional inspection: Conducting quality checks throughout the entire process, including incoming inspection, initial piece inspection, in-process inspection, and final inspection, to ensure the final product meets the required specifications.
Surface treatment: Applying surface treatment processes such as oxidation, plating, electrophoresis, passivation, or other required treatments to the workpiece.
Packaging: Packaging the finished product and verifying the accuracy of the packaging labels.
Free Sample
Explore Other Guide and resource
Passivation of Aluminum and Aluminum Alloys
For aluminum and aluminum alloy workpieces, whether obtained through chemical oxidation or anodization, the resulting oxide film is porous, prone to contamination, and has poor corrosion resistance. Even after coloration
12 Automatic Lathe Manufacturers in china in 2024
The CNC machining process arrangement of the combined turning and milling parts involves considering the processing sequence and clamping scheme to ensure the machining accuracy and dimensional tolerance of the
Analysis of CNC turned and milled parts
The CNC machining process arrangement of the combined turning and milling parts involves considering the processing sequence and clamping scheme to ensure the machining accuracy and dimensional tolerance of the
